Grafting is a horticultural technique used to join parts from two or more plants so that they appear to grow as a single plant. In roses, grafting is often used to propagate new varieties or to combine the best characteristics of two plants, such as the flowers of one with the rootstock of another that offers disease resistance or hardiness. Here’s a basic guide on how to graft a rose onto another variety:
Materials Needed:
- A rootstock rose plant (the plant that provides the root system)
- A scion (a cutting from the desired variety of rose that you want to graft onto the rootstock)
- A sharp grafting knife or razor blade
- Grafting tape or strips of plastic
- A sealant (such as grafting wax or a suitable alternative to protect the graft)
- Labels or markers to identify the graft
Steps for Grafting Roses:
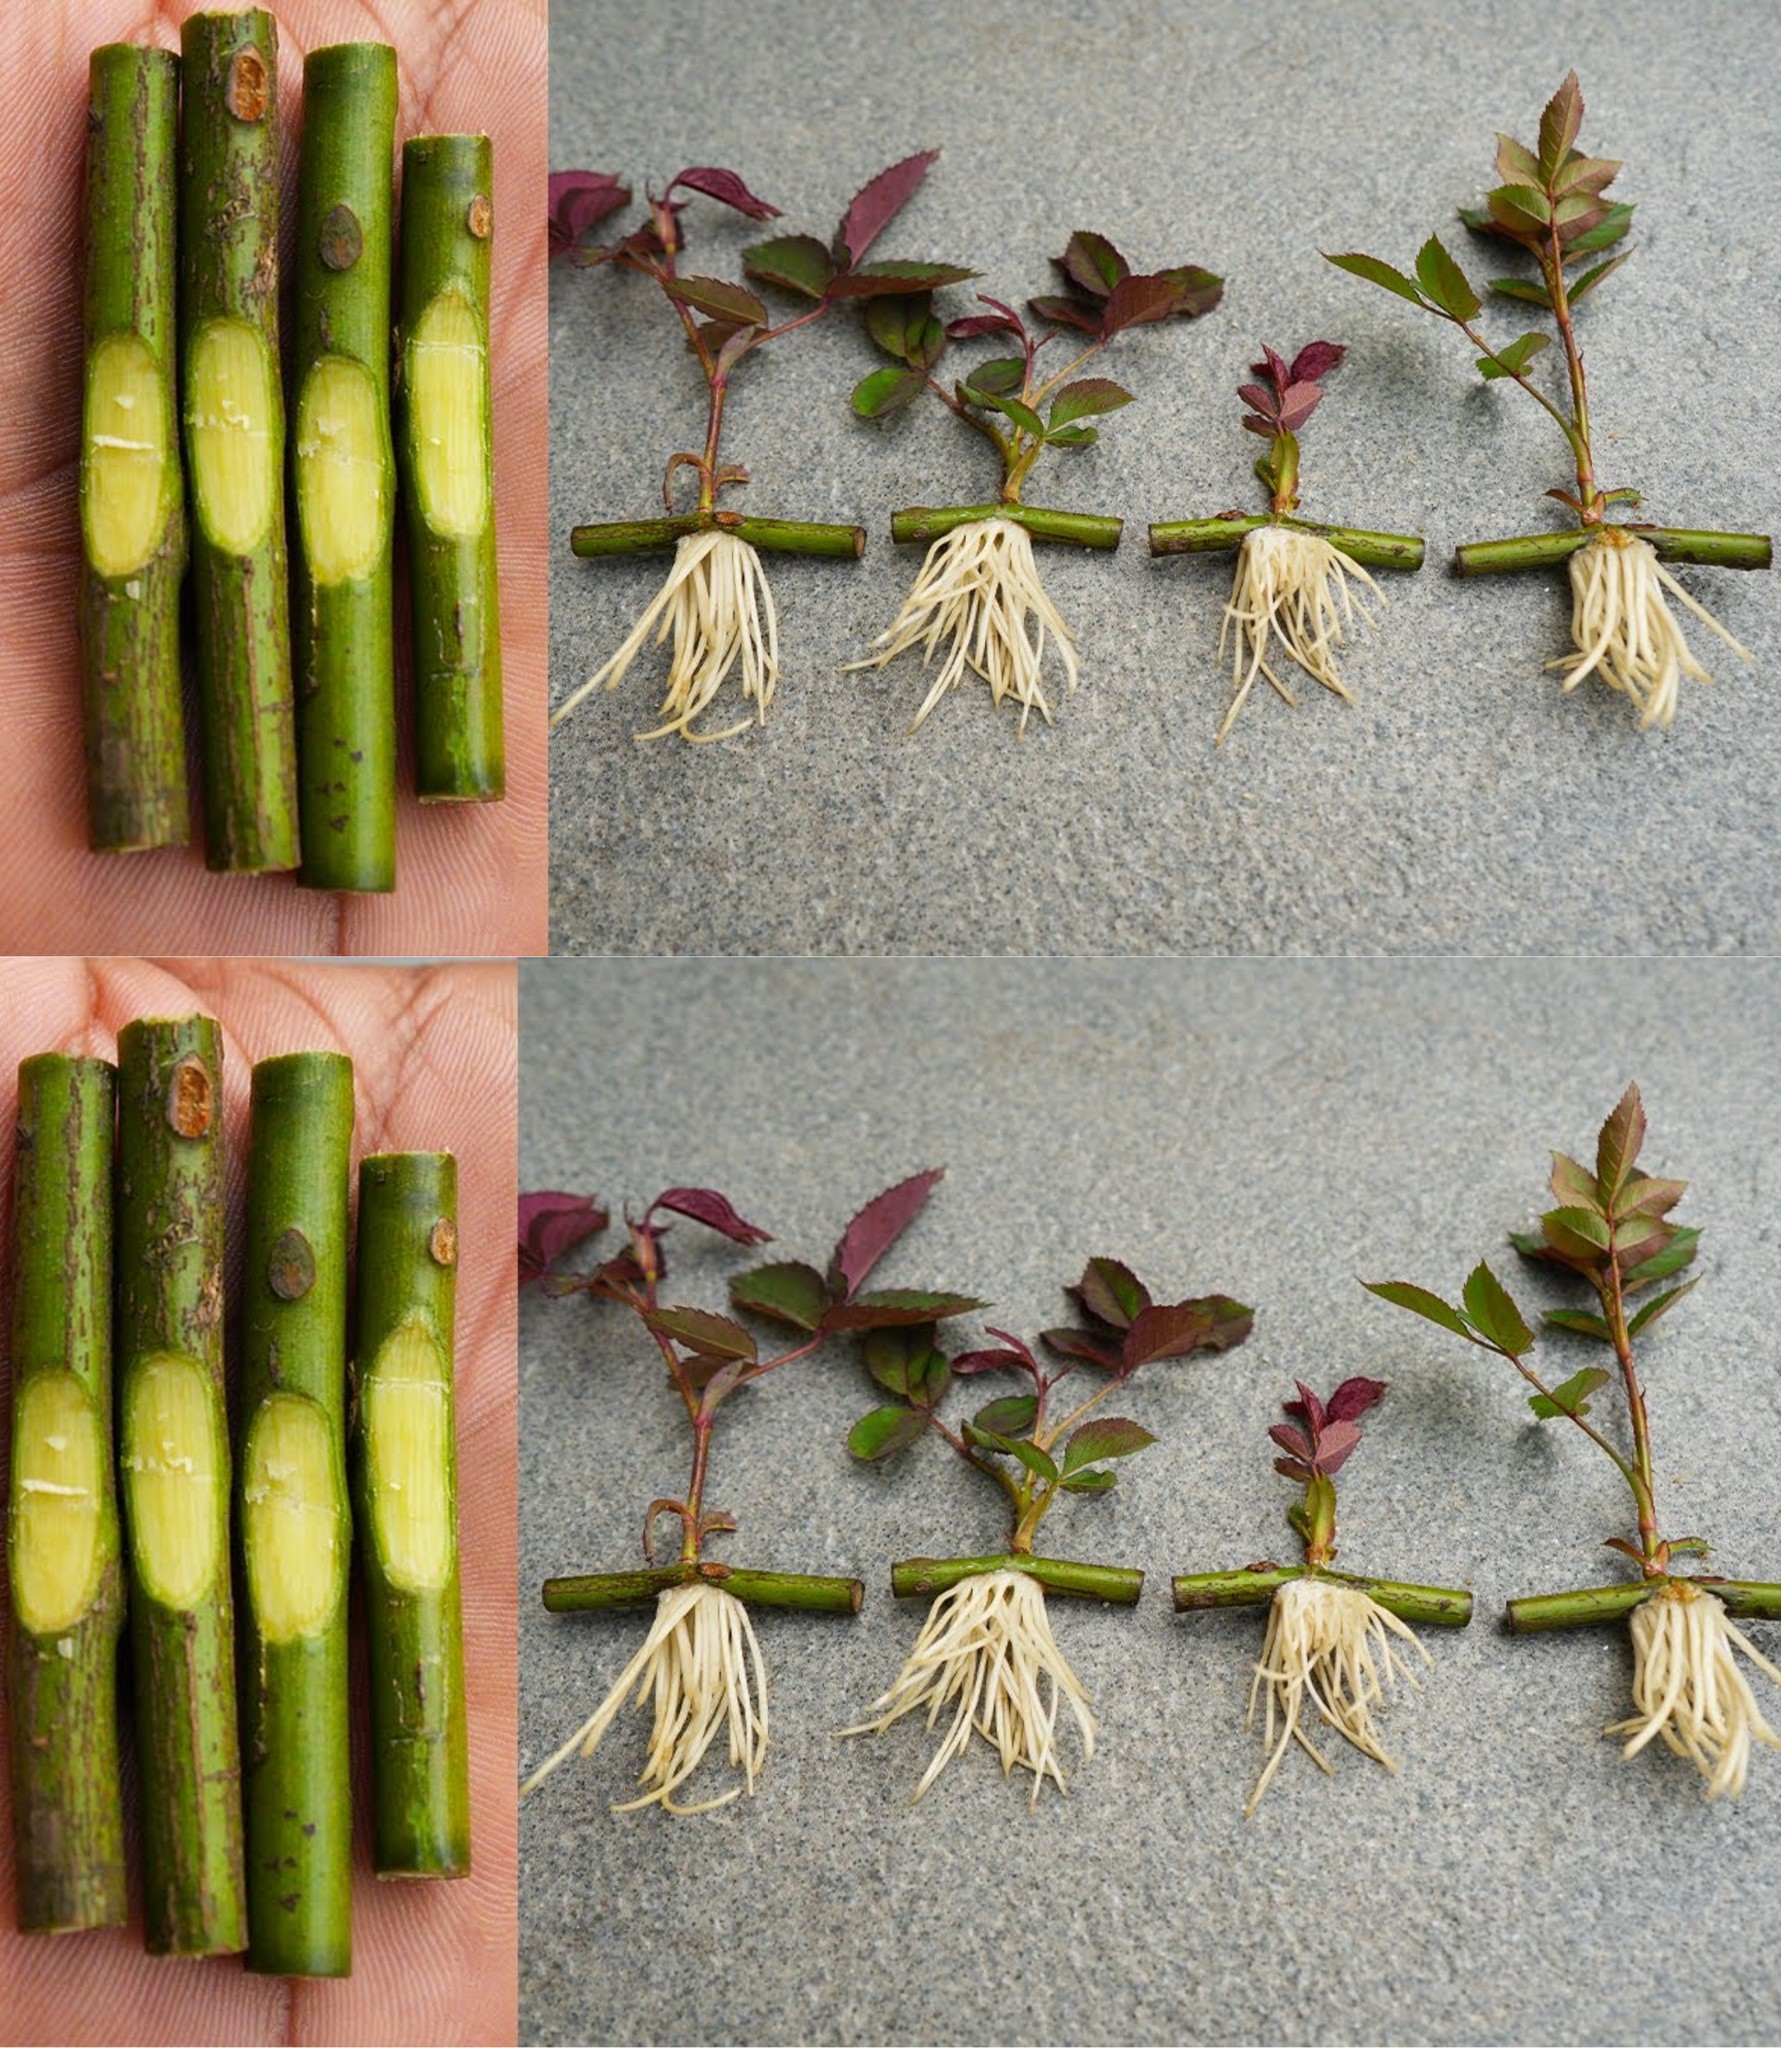
1. Selecting the Scion
- Choose a healthy, disease-free rose as the source of your scion.
- Cut a piece of new growth that has at least two or three buds on it. This should be done early in the morning when the plant is full of moisture.
2. Preparing the Rootstock
- Select a rootstock that is hardy and well-established.
- Cut the top off the rootstock at the point where you want to insert the scion. Make sure the cut is clean and smooth.
3. Making the Graft Cut
- On the rootstock, make a T-shaped cut or a sloping cut, depending on the grafting method you’re using (T-budding or cleft grafting are common).
- For the scion, make a corresponding cut so that it will fit snugly onto or into the rootstock.
4. Joining Scion and Rootstock
- Insert the scion into the cut on the rootstock. The cambium layers (the green layer just beneath the bark) of both the scion and the rootstock need to be in contact with each other for the graft to take successfully.
- Ensure that the cuts match up as closely as possible.
5. Securing the Graft
- Use grafting tape or plastic strips to tightly wrap the graft site. This holds the scion in place and prevents moisture loss and disease entry.
- Apply a sealant to any exposed cuts to further protect the graft.
6. Aftercare
- Keep the graft site moist and watch for signs of growth.
- Once the scion begins to grow and the graft has taken, you can gradually remove the tape or plastic.
- Prune away any shoots that grow below the graft site on the rootstock, as these will sap energy from the grafted variety.
7. Labeling
- Label your graft with the date and variety so you can keep track of its progress and identity.
Tips:
- Grafting is typically done in late winter or early spring when the plants are still dormant.
- The success of grafting can be influenced by temperature and humidity, so consider these factors when planning your grafting.
- Practice good sanitation by sterilizing your tools before and after grafting to prevent the spread of disease.
Grafting can be a trial-and-error process, and success rates can vary. Don’t be discouraged if your first attempts don’t take; with practice, your technique will improve.